Home Network Problems? 8 Diagnostic Tricks and Fixes to Try
Have problems with your home network? Learn how to troubleshoot network connectivity problems and get back online!
Of all the types of computer issues you can have, network problems are one of the worst. Though our computers can do a lot offline, being cut off from the internet isn’t fun. Even worse, when you can’t get online, it’s more difficult to research fixes for your problem.
Let’s step through the basic process of how to troubleshoot network connectivity problems. That way, next time you open up your web browser to a Cannot Connect message, you’ll know what to do.
Like all troubleshooting, we’ll start broadly and narrow down to specifics. After each step, try connecting to a website to verify that your connection is fixed. If it still doesn’t work, continue to the next part.
0. Make Sure It’s Actually Your Network Problem
Sometimes, what seems like an issue with your network is actually a problem on a specific website’s end. If you can’t get on Twitter, for instance, check another few websites to make sure that the problem isn’t just with a single site.
You can visit downfor.io, which is a short URL for the site Down for Everyone or Just Me?, to easily check if a website is down for everyone. Simply enter the URL and you’ll see where the issue lies.
If a site is down for everyone, you’ll have to wait until it’s fixed. But if the problem is only affecting you, continue on to troubleshoot.
1. Power Cycle Everything and Check Other Devices
There’s no need to get upset about network issues right away, as the fix to your problem might be as simple as rebooting your equipment. Restarting fixes a lot of issues, so make sure it’s your first response to network problems, too.
To start troubleshooting, reboot your PC, as well as your modem and router. If your modem and router have power buttons on the back, you can press those to turn them off. Otherwise, just pull the power plugs.
To fully clear the modem and router caches, wait 60 seconds before you turn them back on again. When you plug everything back in, plug your modem in first and wait for it to fully power on before connecting your router.
Turning everything off and back on first ensures that it isn’t a temporary network problem. It’s better to reboot now than to waste 30 minutes continuing on when you don’t need to.
Once you’ve restarted, if you have a second computer (or a mobile device), try getting online with that. If you find that no devices can connect, you likely have an issue with your equipment or your ISP.
Should you find that only one computer can’t get online, you can continue to narrow down the problem. On that device, make sure to run an antivirus scan to ensure you don’t have malware interfering with your connection. You should also make sure that your firewall settings aren’t blocking the connection.
Finally, try using a different browser to see if your usual one is somehow misconfigured. See how to fix “your connection is not private” errors if you’re seeing them on every website, which is a separate issue that involves security certificates.
2. Check Physical Network Connections
If your network problem persists after rebooting, you should next check to make sure that all physical network connections are in place. This is another easy fix before you start diving into settings and tests.
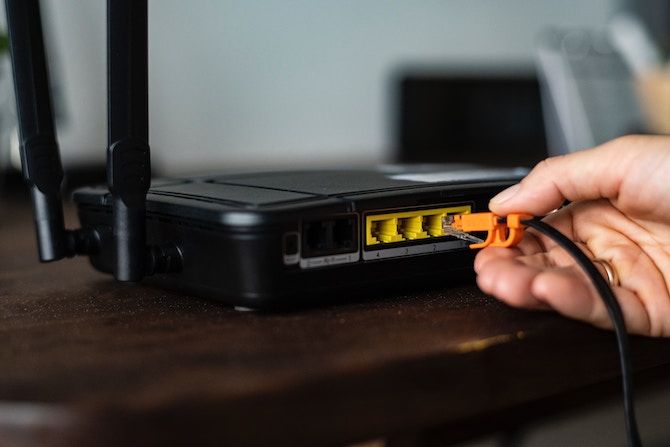
If you use an Ethernet cable to connect to your router, check to make sure that it’s not unplugged or damaged. If your laptop has a physical wireless switch, make sure that it’s not set to the off position.
Once you’ve verified a proper connection, check your router and modem. Are the lights on your router and/or modem flashing green as normal? If no lights come on after the reboot, the device could be dead or malfunctioning.
However, if you get red lights, or a power light but no connection light, your ISP is likely experiencing disruption. See #6 below if you think this is the issue—you may need to check the manuals for your equipment to interpret the lights correctly.
3. Run the Windows Network Troubleshooter
Windows includes some built-in troubleshooters that can automatically find and fix issues. To run the troubleshooter for network problems, right-click the network icon in your System Tray and choose Troubleshoot Problems.
You can also go to Settings > Update & Security > Troubleshoot > Additional troubleshooters and choose Internet Connections > Run the troubleshooter to launch it.
Once the troubleshooter runs, it could fix issues, find issues but fail to fix them, or find nothing. If the troubleshooter finds a problem that it fixes, try to connect again. If you get a specific error or problem name that Windows can’t fix automatically, take note of it for later research.
Advanced users might also look at using other Windows tools to troubleshoot network issues.
4. Confirm That You Have a Valid IP Address
At this point, you’ve verified that the problem is not temporary and that all your hardware works. Since Windows can’t fix the problem on its own, you need to pinpoint the spot along the connection where the network problem is occurring.
It’s a good idea to make sure that you don’t have any strange IP settings selected. To check this, open Settings and go to Network & Internet > Status. Below the Advanced network settings header, choose Change adapter options. In the resulting window, double-click the name of your network.
Next, you’ll see a status window. Click the Properties button here.
Inside the next dialog, double-click the Internet Protocol Version 4 entry.
Unless you’ve set up a static IP address (if you don’t know what this is, you probably don’t use one), make sure you have both Obtain an IP address automatically and Obtain DNS server address automatically checked.
Repeat this process for Internet Protocol Version 6, if it’s enabled, to ensure everything is automatic there as well.
Reviewing Your IP Address Validity
Once you’ve done the above, you should check to confirm if the router is giving you a valid IP address. Open up a Command Prompt window by typing cmd into the Start Menu. Enter ipconfig and hit Enter, then look for the text under Ethernet adapter (for wired connections) or Wireless LAN Adapter (for wireless connections).
If IPv4 Address looks like 169.x.x.x, your computer is not receiving a valid IP address from your router. Typing the following two commands, one at a time, will release your computer’s current IP address and request a new one, which may resolve this:
ipconfig /release
ipconfig /renew
Should you still have a 169.x.x.x address after typing the above commands and entering ipconfig again, your machine still isn’t receiving an IP from the router. Try plugging your PC directly into the modem with an Ethernet cable and see if you can get online.
If the connection works this way, your router is the problem. You may need to factory reset your router, or consider replacing it.
5. Try a Ping and Trace Its Route
If your IP address starts with anything other than 169 when you run ipconfig, you have a valid IP address from your router. At this point, you’ve confirmed the problem is somewhere between your router and the internet.
Type the below command to ping Google’s DNS servers to see if you can reach a website online (you can replace 8.8.8.8 with anything you like, such as www.msn.com):
ping 8.8.8.8This will send four packets to Google’s DNS server. If they fail to send, you’ll see some basic info about the failure. In case you want to continue pinging indefinitely so you can monitor it while troubleshooting, just add a -t to the end, like so:
ping 8.8.8.8 -tYou can press Ctrl + C to stop pinging at any time. For more information, type this command to trace the route between your computer and Google’s DNS servers:
tracert 8.8.8.8The above command gives you a step-by-step breakdown of the path the information takes to reach the destination you specify. Watch it, and if it fails, check to see where the problem occurs.
If an error pops up early in the route, the issue is likely with your local network. There are more useful CMD commands for networking, if you’re interested.
6. Contact Your ISP
Should all the above steps complete successfully, you’ve now verified that your equipment is working and confirmed you have a valid IP address from the router. Also, you’re sure that the problem is occurring outside of the network, and for multiple devices. If this is the case, your next best option is to find out if your ISP is having issues.
Using your smartphone will prove useful here, as you can look up an outage map (like DownDetector.com) for your provider. Searching Twitter to see if others in your area are experiencing issues can help as well.
If you don’t see anything of note online, try giving your ISP a call to see if there are known outages. Perhaps line issues are affecting a small area; a representative should be able to run tests to check.
7. Wait the Network Problems Out
Once you’ve let your ISP know of the issue and confirmed that it’s not just one computer having a problem, all you can do is wait. Many times, you can’t fix network issues on your own.
If your ISP is aware of the issues, hopefully they’ll get everything fixed in a short time. Meanwhile, you can take the opportunity to enjoy reading a book, going for a walk, or something else that’s offline.
8. Troubleshoot Specific Network Issues
While we covered general steps here, if you’re seeing a specific network error, it can help to focus your troubleshooting on that. Have a look below at some guides for particular network problems:
- Connected to Wi-Fi, but no internet access
- IP address conflicts
- “Windows can’t communicate with the device or resource”
- “Windows could not automatically detect network proxy settings”
Hopefully, one of these guides with more focused advice will solve your issue if these tips didn’t work.
Diagnose and Fix Your Network Problems
These steps are a general template for diagnosing network issues, as your exact setup may differ. In general, respond by restarting everything, seeing if multiple devices are having trouble getting online, and checking to make sure your settings are correct, per the above.
Even after you solve your major network issue, your connection might still be slow. This is a separate problem to work on.
Written by: Ben Stegner


